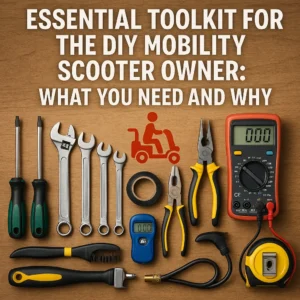
Introduction: Equipping Yourself for Independence
Successfully performing Do-It-Yourself (DIY) maintenance and repairs on your mobility scooter hinges on three key elements: knowledge, safety consciousness, and having the right tools for the job. Previous articles have focused on understanding common problems, diagnostic procedures (like interpreting error codes), and the critical importance of safety precautions. This article focuses squarely on the third element: the essential toolkit. Attempting repairs with inadequate or incorrect tools is not only frustrating and often ineffective, but it can also lead to damaged components, stripped fasteners, and even personal injury.
Advertisement
Assembling a dedicated toolkit for your mobility scooter doesn’t necessarily mean spending a fortune, but it does mean investing wisely in quality tools that will serve you well for common tasks. Having the right screwdriver, wrench, or diagnostic device readily available makes routine checks and minor repairs significantly easier and safer. This guide will walk you through the essential tools every proactive mobility scooter owner should consider having on hand, explaining why each tool is necessary, what specific types or sizes are often required, and offering tips on selection and safe usage. Think of this toolkit as an investment in your continued mobility and independence, empowering you to handle basic upkeep and minor fixes confidently.
Foundational Hand Tools: The Backbone of Your Kit
These are the versatile workhorses you’ll reach for most often for disassembly, assembly, and adjustments.
1. Screwdrivers (Phillips Head and Flat Head)
- Why Needed: Used extensively for removing plastic body shrouds, accessing battery compartments, opening control housings, securing wire terminal covers, and tightening various small fasteners throughout the scooter.
- Essential Types/Sizes:
- Phillips Head: Sizes #1, #2, and #3 are most common. Size #2 is often the most frequently used for shroud screws. Having magnetic tips can be extremely helpful for starting screws in recessed holes.
- Flat Head (Slotted): Less common on modern scooters for structural screws but still useful for prying open certain clips (use carefully!), adjusting some older types of terminal screws, or occasionally on specific components. A small and medium size are useful.
- Selection Tips: Choose screwdrivers with hardened tips that resist wear (look for materials like S2 steel or Chrome Vanadium). Handles should be comfortable and provide a good grip. A set covering various sizes is usually the most cost-effective approach.
- Safe Usage: Ensure the screwdriver tip fits snugly into the screw head to prevent stripping. Apply firm, straight pressure while turning. Never use a screwdriver as a chisel or pry bar.
2. Wrenches (Combination or Adjustable)
- Why Needed: Essential for tightening and loosening nuts and bolts found on battery terminals, wheel assemblies, seat mounts, tiller adjustments, and various frame components.
- Essential Types/Sizes:
- Combination Wrench Set (Metric & SAE): This is often the best investment. Combination wrenches have an open end and a box/ring end for versatility. Common sizes needed might include (metric) 8mm, 10mm, 13mm, 14mm, 17mm and (SAE/Imperial) 3/8″, 7/16″, 1/2″, 9/16″, 5/8″. Check your scooter or manual for specific common sizes.
- Adjustable Wrench (Crescent Wrench): A versatile backup if you don’t have the exact size combination wrench, or for holding one side of a bolt while tightening the nut. Get a small (6-inch) and medium (8-10 inch) size. However, use with caution as they can slip and round off fasteners more easily than fixed-size wrenches.
- Selection Tips: Look for wrenches made from chrome vanadium steel for strength and durability. Ensure the jaws on adjustable wrenches move smoothly and lock firmly.
- Safe Usage: Whenever possible, use the box/ring end of a combination wrench for better grip and less chance of slipping. Ensure the wrench fits the nut/bolt snugly. Pull the wrench towards you rather than pushing away. Never use a pipe or another wrench to extend the handle for extra leverage (cheater bar) unless specifically designed for it, as this can break the tool or fastener.
3. Pliers (Various Types)
- Why Needed: Useful for gripping small objects, cutting wires (use dedicated wire cutters if possible), bending light metal tabs, holding nuts steady in tight places, and sometimes removing stubborn connectors (use gently!).
- Essential Types:
- Needle-Nose Pliers: Excellent for reaching into tight spaces, gripping small wires or connectors, and bending precise angles.
- Standard Slip-Joint Pliers: Good for general gripping tasks with adjustable jaw width.
- Wire Cutters/Strippers: While some pliers have basic cutters, a dedicated wire cutter provides a cleaner cut. A wire stripper is essential if you need to repair or splice wires safely (though complex wiring is often best left to pros).
- Selection Tips: Look for pliers with comfortable, insulated grips (especially important if ever working near potentially live low-voltage circuits, though ideally power is always off). Ensure cutting edges are sharp and jaws align properly.
- Safe Usage: Don’t use pliers to turn nuts or bolts unless absolutely necessary, as they can easily damage the fastener heads. Use appropriate force; don’t try to cut materials too hard for the pliers. Wear eye protection as cutting wires can cause small pieces to fly.
4. Socket Set with Ratchet (Optional but Highly Recommended)
- Why Needed: Offers significant advantages over wrenches for speed and access in certain situations, especially for removing multiple bolts like those holding wheels or motor assemblies.
- Considerations: A basic 1/4-inch or 3/8-inch drive set with common metric and SAE socket sizes can be very helpful. Deep sockets are sometimes necessary for accessing nuts on longer bolts.
- Selection Tips: Quality matters for ratchets; look for smooth mechanisms. Sockets should be clearly marked and made of durable steel.
- Safe Usage: Ensure the socket is fully seated on the nut/bolt. Support the ratchet head to keep it aligned while applying force.
Measurement & Diagnostic Tools: Seeing the Unseen
These tools help you diagnose problems that aren’t always visually apparent.
5. Digital Multimeter (DMM)
- Why Needed: Absolutely essential for diagnosing electrical problems. Used to measure:
- DC Voltage: Checking battery charge level, verifying power to components, testing charger output.
- Continuity: Checking if a wire, fuse, or switch connection is complete (unbroken path).
- Resistance (Ohms): Testing components like potentiometers (throttle/joystick), motor windings, or brake coils (requires reference values from manual).
- Essential Features: Look for a multimeter with clear DC Voltage (VDC), Resistance (Ω), and Continuity (often indicated by a sound symbol) settings. Auto-ranging models are easier for beginners. Ensure it comes with good quality probes (test leads).
- Selection Tips: You don’t need an expensive professional model for basic scooter tasks. A reliable entry-level DMM from a reputable brand is sufficient. Ensure it meets basic safety standards (e.g., CAT II or CAT III rating, though high voltage isn’t typical on the scooter itself).
- Safe Usage: CRITICAL! Review Article 3 on Electrical Safety. Learn how to use the DMM correctly *before* testing. Set the function and range *before* connecting probes. Never touch probes together when testing voltage. Hold probes by insulated areas only. When testing continuity or resistance, ensure the circuit/component is NOT powered (Batteries Disconnected!).
6. Tire Pressure Gauge
- Why Needed: For scooters with pneumatic (air-filled) tires, maintaining correct tire pressure is vital for safety, performance, range, and tire longevity. Under-inflation increases puncture risk and drag; over-inflation reduces traction and comfort.
- Essential Types: A simple pencil gauge, dial gauge, or digital gauge will work. Digital gauges are often easiest to read accurately. Ensure the gauge covers the pressure range needed for your scooter tires (check manual or tire sidewall – typically between 25-50 PSI, but varies greatly).
- Selection Tips: Choose one that’s easy to read and forms a good seal on the tire valve stem.
- Usage: Press the gauge firmly and straight onto the valve stem until the hissing stops to get an accurate reading. Check pressure when tires are cold (not immediately after riding).
7. Tape Measure or Ruler
- Why Needed: Useful for measuring tire tread depth (using the depth end of some gauges or a small ruler), checking component dimensions if ordering replacements, or measuring clearances.
- Selection: A small, basic tape measure or a 6-inch metal ruler is usually sufficient.
Battery and Tire Service Tools
Specific tools for maintaining these common problem areas.
8. Battery Terminal Cleaner / Wire Brush
- Why Needed: Corrosion (white/blue powder) on battery terminals prevents good electrical contact, leading to charging issues, power loss, and starting problems.
- Tool: A dedicated battery post/terminal cleaning tool (looks like a wire brush cap) is ideal. A small, stiff wire brush (brass bristles are less likely to damage terminals than steel) can also work.
- Usage: (Power OFF, Batteries Disconnected!) Wear gloves and eye protection. Gently brush away corrosion from battery posts and cable connectors until shiny metal is visible. Wipe away residue.
9. Tire Pump or Air Compressor
- Why Needed: To inflate pneumatic tires to the correct pressure.
- Options:
- Manual Bicycle Pump (Floor or Hand Pump): Economical and effective, especially if it has a built-in gauge. Requires physical effort.
- Electric Inflator / Small Air Compressor: Faster and easier, especially if frequent top-ups are needed. Choose one designed for tires with a pressure gauge and appropriate valve connector (usually Schrader valve, like cars/bikes).
- Usage: Ensure pump connector seals well on the valve stem. Inflate to the pressure specified in your scooter manual or on the tire sidewall. Do not overinflate.
10. Tire Repair Kit / Tire Levers (for Pneumatic Tires)
- Why Needed: To patch small punctures in air-filled tires or to remove the tire from the rim for tube/tire replacement.
- Kit Contents: A basic tire patch kit (for tubeless or tubed tires, depending on your scooter) usually contains patches, adhesive, and a scuffer. Tire levers (plastic or metal with smooth edges) are needed to pry the tire bead off the rim.
- Considerations: Tire repair can be tricky. Replacing an inner tube or tire often requires removing the wheel assembly, which can be complex. Patching might be a temporary fix. Review Article 5 (Repairing/Replacing Wheels) and assess if this is a DIY task you’re comfortable with.
Cleaning and Lubrication Supplies
Essential for preventative maintenance and smooth operation.
11. Cleaning Supplies
- Needed: Soft cloths (microfiber preferred), assorted brushes (soft bristle, stiff bristle like a toothbrush), mild soap/detergent, water, bucket, compressed air can, electrical contact cleaner (plastic-safe).
- Purpose: Keeping the scooter clean prevents dirt buildup that can interfere with controls, corrode connections, or hide developing problems. Compressed air is great for cleaning around controls and electronics. Contact cleaner is specifically for cleaning electrical connections without leaving residue.
12. Lubricants
- Needed: Check your manual for specific recommendations! Common types include:
- Silicone Spray: Good for lubricating plastic parts, weather seals, and sometimes tiller pivots (check manual). Doesn’t usually attract dirt.
- White Lithium Grease: Often used for metal-on-metal pivot points like seat posts or tiller mechanisms (check manual).
- Dielectric Grease: Applied sparingly to electrical connector contacts (AFTER cleaning) to prevent corrosion and moisture intrusion without hindering conductivity.
- Purpose: Reduces friction, prevents squeaks, protects against corrosion, and ensures smooth movement of mechanical parts. Use sparingly and only where recommended. Avoid getting lubricants on brake components or tires.
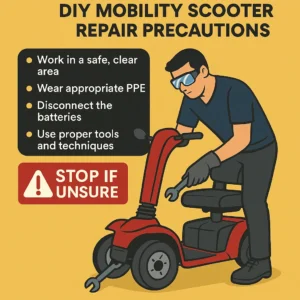
Safety Gear (Reiteration is Key!)
As emphasized in Article 3, safety gear is a non-negotiable part of your toolkit.
13. Essential PPE
- Safety Glasses/Goggles: Protects eyes from debris, fluids, sparks.
- Gloves: Mechanic’s gloves for grip/cuts, chemical-resistant gloves for batteries/solvents.
- Appropriate Clothing/Footwear: Sturdy, closed-toe shoes and non-loose clothing.
‘Nice-to-Have’ / Advanced Tools
These tools expand your capabilities but might not be essential for basic tasks.
- Torque Wrench: Ensures critical fasteners (like wheel nuts or motor mounts) are tightened to the manufacturer’s precise specification, preventing over-tightening (damage) or under-tightening (loosening).
- Soldering Iron & Solder: For repairing broken wires or replacing soldered components (requires skill and practice – generally professional territory).
- Jack and Jack Stands: For safely lifting the scooter to work on wheels or underneath components. Must be rated for the scooter’s weight.
- Inspection Mirror & Magnetic Pickup Tool: Helps see into hidden areas and retrieve dropped metal fasteners.
- Battery Load Tester: More advanced than a multimeter for assessing battery health under load (often used by professionals).
Tool Storage and Maintenance
Keeping your tools organized and in good condition is part of the process.
- Storage: A small toolbox, tool bag, or dedicated drawer keeps tools organized, protected, and readily accessible.
- Cleaning: Wipe tools clean after use, especially if exposed to grease or battery corrosion.
- Rust Prevention: Store tools in a dry place. Apply a light coat of oil (like WD-40 or machine oil) to metal tools occasionally to prevent rust, wiping off excess.
- Maintain Sharpness: Keep cutting edges of wire cutters sharp.
Conclusion: Investing in Your Capability
Having the right tools is fundamental to performing safe and effective DIY maintenance and repairs on your mobility scooter. This essential toolkit, combining basic hand tools, diagnostic aids, specific items for battery and tire care, and cleaning supplies – all underpinned by crucial safety gear – empowers you to tackle common tasks confidently. While the initial investment might seem notable, it pales in comparison to potential professional repair costs for minor issues and, more importantly, contributes significantly to the longevity and reliability of your scooter.
Start by acquiring the foundational tools and add others as needed based on the tasks you feel comfortable undertaking. Remember to prioritize quality over cheap alternatives, as good tools are safer and perform better. By equipping yourself properly, you’re not just buying tools; you’re investing in your ability to maintain your independence and keep your vital mobility aid in top condition.
Disclaimer: This guide provides general recommendations for tools. Specific requirements may vary by scooter model. Always consult your scooter’s user manual for manufacturer-specific tool recommendations or procedures. Prioritize safety in tool selection and usage. If unsure about a tool or procedure, contact a qualified mobility scooter technician.